How to Fix Dry Turkey: The Ultimate Guide to Saving and Preventing a Dry Bird
How to Fix Dry Turkey: Take a deep breath. It’s the centerpiece of the most anticipated meal of the year. You’ve roasted it for hours, the skin is a perfect golden-brown, and the whole house smells like a holiday dream. You carve into your Thanksgiving turkey, take a bite, and your heart sinks. It’s dry.
Don’t panic! This is one of the most common kitchen crises, and it happens to even the most seasoned cooks. The great news is that your Thanksgiving dinner is far from ruined. A dry turkey is not a final verdict; it’s a problem with a solution. With a few simple techniques, you can add moisture, flavor, and tenderness back into the meat, and your guests will be none the wiser.
This comprehensive guide will walk you through everything you need to know. We’ll cover immediate emergency fixes to save your meal right now, and then dive deep into the science and strategy to ensure you cook a perfectly juicy turkey every single time.
What You’ll Learn In This Guide
- Immediate Emergency Fixes – Five quick and effective methods to save your turkey right now.
- The Ultimate Prevention Playbook – A deep dive into the techniques that guarantee a moist turkey, from choosing the right bird to the science of resting.
- From Problem to Project: Creative Leftover Ideas – How to transform your saved turkey into delicious new meals.
- Frequently Asked Questions (FAQ) – Answering all your lingering turkey questions.
Jump To:
How to Fix Dry Turkey (The Emergency Fixes)
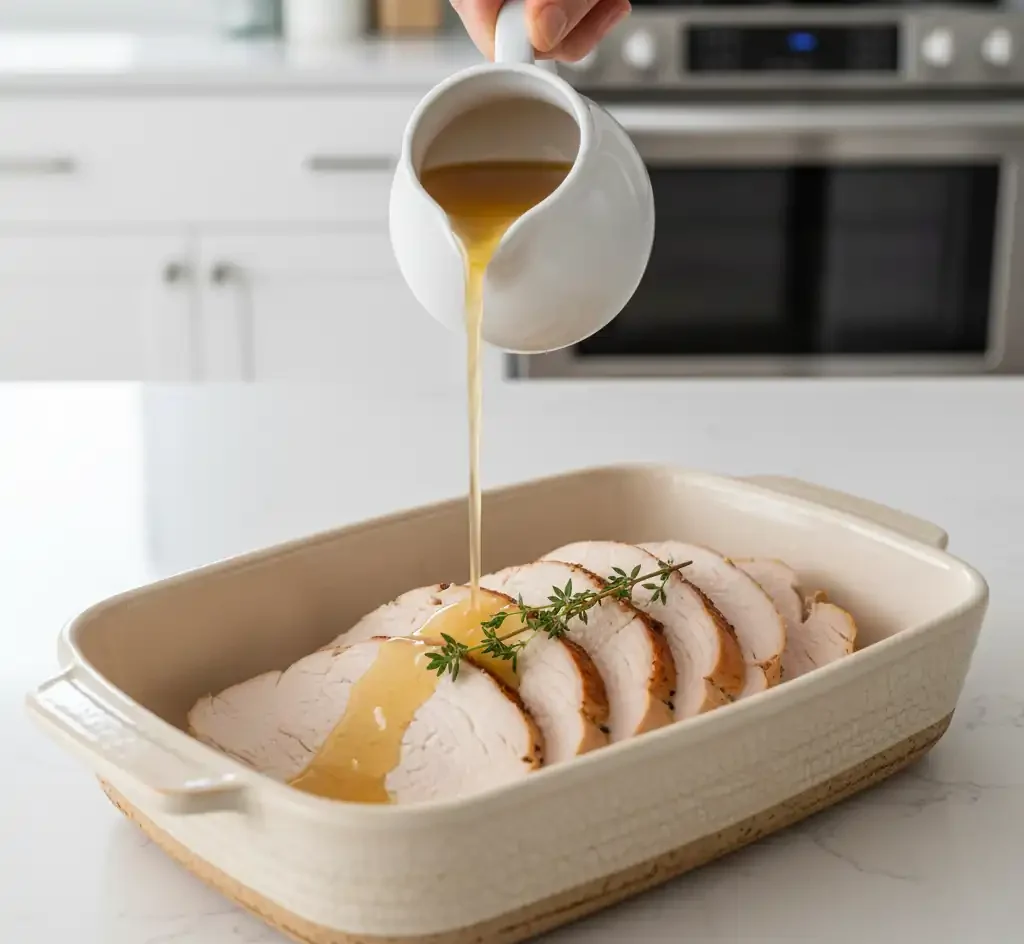
Your immediate goal is to reintroduce moisture and fat to the meat. Carve or slice the turkey first, as it’s much easier to remoisten individual pieces than a whole bird.
Method 1: The Flavorful Broth Soak (The #1 Easiest Fix)
This is the fastest way to add instant moisture and flavor back into overcooked turkey.
- Best for: Quickly reviving slices of turkey just before serving.
- What You Need: Sliced turkey, a shallow baking dish, and warm chicken or turkey broth.
- Instructions:
- Arrange the sliced turkey in a single layer in a warm, oven-safe baking dish. Overlapping is okay, but a single layer is best.
- Gently pour about a half-cup of warm broth over the meat. A rich, homemade broth from a classic Jewish chicken soup works beautifully here. The goal is to moisten, not to drown the meat.
- Cover the dish tightly with aluminum foil and place it in a warm oven (around 200°F or 95°C) for 10-15 minutes. This gentle steaming action allows the meat to absorb the liquid without cooking further.
- Serve immediately. The meat will be tender, juicy, and flavorful.
- Pro-Tip: Infuse the broth with more flavor by warming it with a sprig of thyme, a smashed garlic clove, or a bay leaf before pouring it over the turkey.
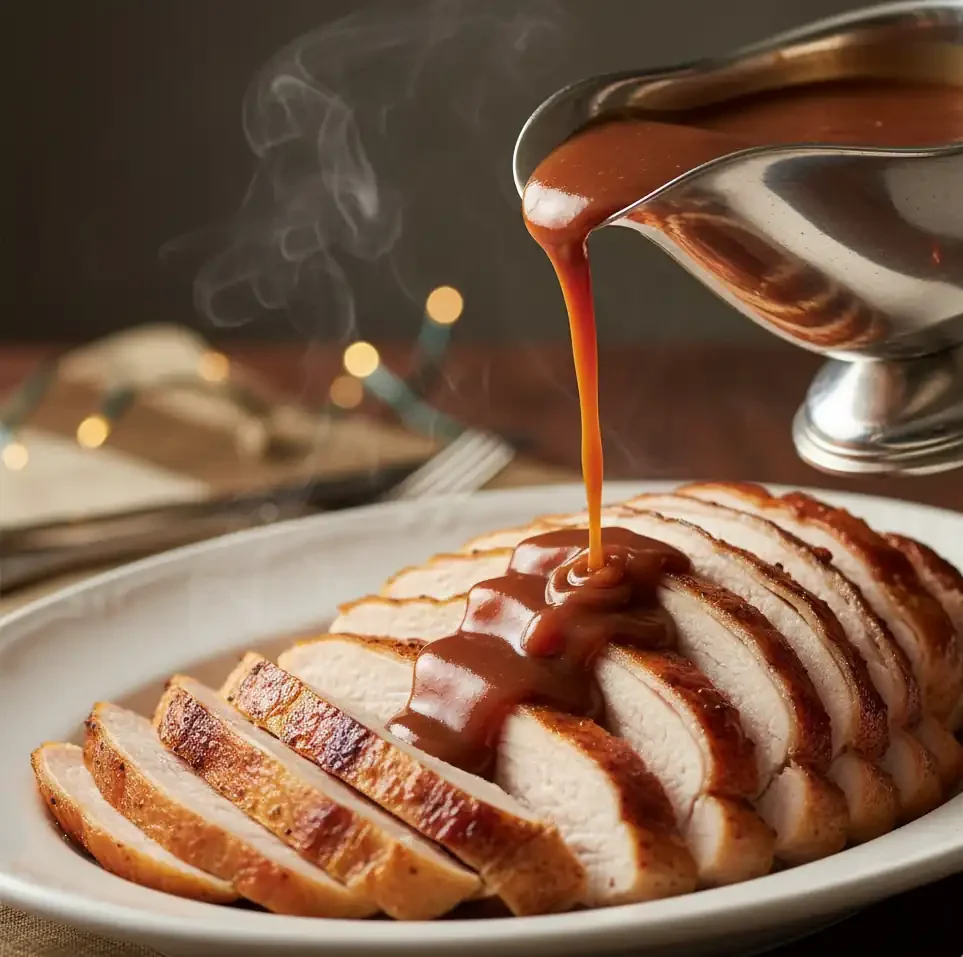
Method 2: Let Gravy Be Your Hero
A phenomenal gravy doesn’t just top a dish; it can become part of it. This method uses gravy as a powerful moisturizing and flavor-infusing sauce.
- Best for: Integrating the fix directly into the serving process.
- What You Need: A high-quality turkey or chicken gravy.
- Instructions: A great gravy can solve almost any problem. If you need a reliable recipe, our crockpot chicken and gravy creates a rich, flavorful sauce that can save any dish.
- Slice or shred the dry turkey meat.
- Place the meat in a saucepan and add a generous amount of warm gravy.
- Gently stir over low heat until the meat is heated through. Let it sit for a few minutes off the heat to absorb the sauce.
- Alternatively, arrange the sliced meat on a serving platter and pour a liberal amount of hot gravy all over it right before it goes to the table. Let it pool around the meat.
Method 3: The Finishing Butter Toss
Fat equals flavor and moisture. A simple toss in melted butter can instantly improve the texture and richness of dry turkey, especially the leaner breast meat.
- Best for: Adding richness and a velvety mouthfeel to white meat.
- What You Need: Sliced turkey, unsalted butter, and optional fresh herbs (parsley, thyme, sage).
- Instructions:
- In a skillet, melt a few tablespoons of butter over low heat. For a deeper, nutty flavor, let it cook until it foams and golden-brown specks appear (this is brown butter).
- Add chopped fresh herbs to the butter and swirl for 30 seconds.
- Add the sliced turkey to the skillet and gently toss for just 1-2 minutes until the meat is evenly coated and warmed through.
- Serve right away for the best results.
Method 4: The “Turkey-in-Cream-Sauce” Disguise
When the texture is particularly dry, the best strategy is to change the dish’s identity. By shredding the meat and enrobing it in a creamy sauce, you create a delicious dish that feels completely intentional.
- Best for: Severely dry turkey or when you want a completely new dish.
- Instructions:
- Shred all the dry meat with two forks.
- In a saucepan, combine the shredded turkey with a can of cream of mushroom or cream of chicken soup and a splash of milk or broth to achieve your desired consistency.
- Heat gently, stirring occasionally, until warm and bubbly.
- Serve this comforting, creamy turkey over mashed potatoes, biscuits, or toasted bread.
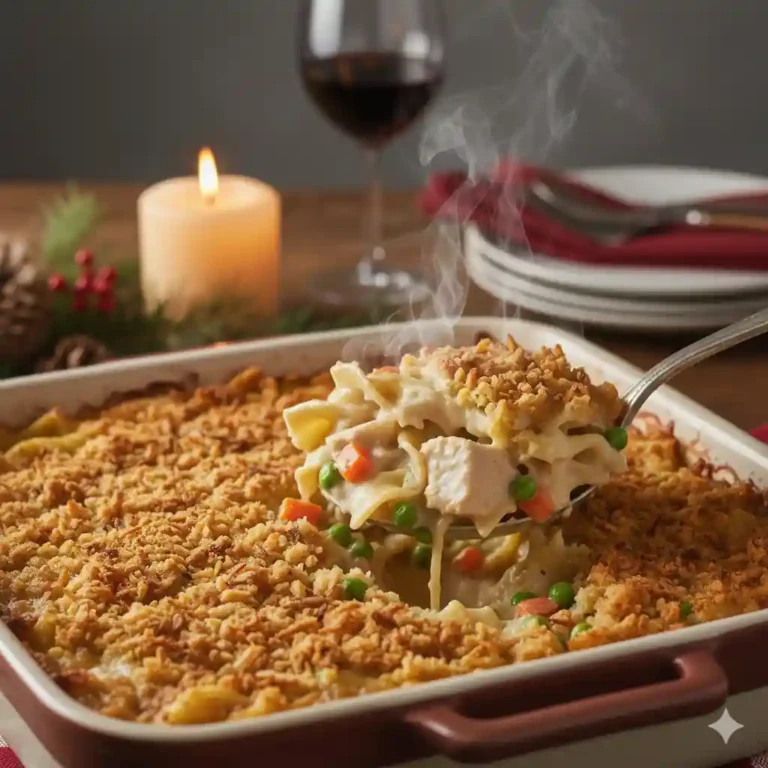
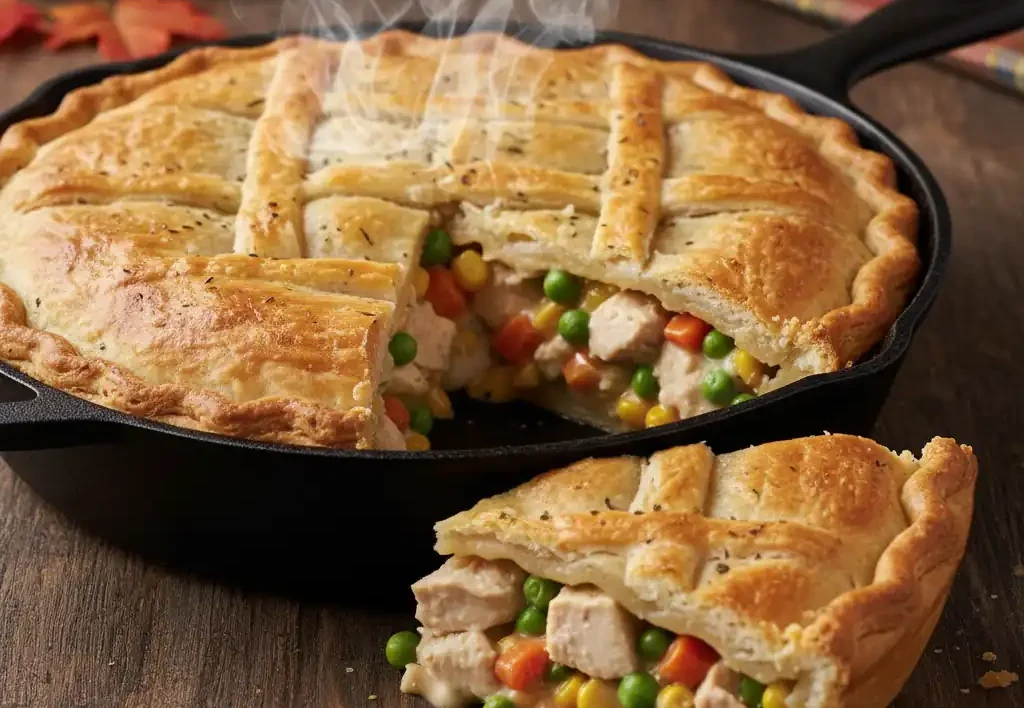
Method 5: Turn It Into a Casserole or Pot Pie
This is the ultimate transformation. You’re not just fixing the turkey; you’re giving it a new and delicious purpose.
- Best for: A fantastic next-day meal or if you have a lot of dry turkey to salvage.
- Instructions: Ready to completely reinvent your dry turkey? Try one of these tested recipes:
- Turkey Pot Pie Recipe – A classic comfort dish that hides dry meat beautifully
- Creamy Turkey Casserole – A richer, one-dish option with creamy sauce and vegetables
Then follow these steps:
- Dice the turkey meat.
- In a large bowl, combine the diced turkey with leftover gravy, some thawed mixed vegetables (like peas and carrots), and perhaps some sautéed onions.
- Transfer the mixture to a baking dish.
- Top with a layer of leftover stuffing, mashed potatoes, or a store-bought pie crust.
- Bake at 375°F (190°C) until the filling is bubbly and the topping is golden-brown.
The Ultimate Prevention Playbook for a Juicy Turkey
Now that you’ve saved dinner, let’s make sure you never face this problem again. A perfectly moist turkey isn’t about luck it’s about technique.
1. Start with the Right Bird
- Fresh vs. Frozen: A fresh turkey has never been chilled below 26°F and often has a better, more supple texture. Frozen turkeys are more common and affordable, but be sure to thaw it completely and safely in the refrigerator (allow 24 hours for every 4-5 pounds).
- Don’t Go Too Big: Larger turkeys (20+ lbs) are notoriously difficult to cook evenly. The breast is often overcooked by the time the thighs are done. If you’re feeding a large crowd, consider roasting two smaller 10-12 lb turkeys instead of one giant one.
2. The Magic of Brining (Wet or Dry)
Brining is the single most effective technique for ensuring a juicy bird. It’s a form of insurance against overcooking.
- How it Works: A brine is a salt solution. Through osmosis, the turkey absorbs the salty water. The salt not only seasons the meat from within but also denatures its proteins, allowing them to retain more moisture during the cooking process.
- Wet Brining: This involves fully submerging the turkey in a saltwater solution (with sugar and aromatics) for 8-24 hours. It’s highly effective but requires a large, food-safe container and significant refrigerator space.
- Dry Brining (Our Recommended Method): This is easier and less messy. You simply rub the turkey all over (and under the skin) with a mixture of kosher salt, sugar, and herbs. Let it rest uncovered in the fridge for 1-3 days. The salt draws out the turkey’s moisture, which then dissolves the salt and is reabsorbed back into the meat. The result is deeply seasoned, moist meat and incredibly crispy skin.
3. The Meat Thermometer is Non-Negotiable
This is the most critical tool for cooking any meat perfectly. Ditch the unreliable pop-up timer that comes with the turkey.
- Why It’s Essential: The #1 cause of dry turkey is overcooking. White breast meat is perfectly cooked at 165°F (74°C), while dark thigh meat needs to reach about 175°F (80°C). An instant-read digital thermometer is the only way to know the exact temperature.
- How to Use It: When you think the turkey is done, insert the thermometer into the thickest part of the thigh, making sure not to touch the bone.
- Understanding Carryover Cooking: You should actually pull the turkey from the oven when the thigh reads 165°F-170°F. The residual heat will continue to cook the bird as it rests, raising the internal temperature by another 5-10 degrees, bringing it to the perfect final temperature.

4. Let It Rest! (This is Not Optional)
This is the final, crucial step. If you carve the turkey straight out of the oven, all the juices that were pushed to the center during cooking will spill out onto your cutting board.
- The Science: Resting allows the muscle fibers to relax and the juices to redistribute and reabsorb throughout the meat.
- How to Do It: Transfer the turkey from the roasting pan to a large cutting board. Tent it loosely with aluminum foil (don’t wrap it tightly, or you’ll steam the skin and make it soggy).
- How Long: Let it rest for at least 20-30 minutes for a standard turkey. Larger birds may need up to 45 minutes. This rest period is the perfect time to make your gravy.
From Problem to Project: Creative Leftover Ideas
Now that your turkey is saved, moist, and delicious, think about the next day! Here are some ideas for using the leftovers.
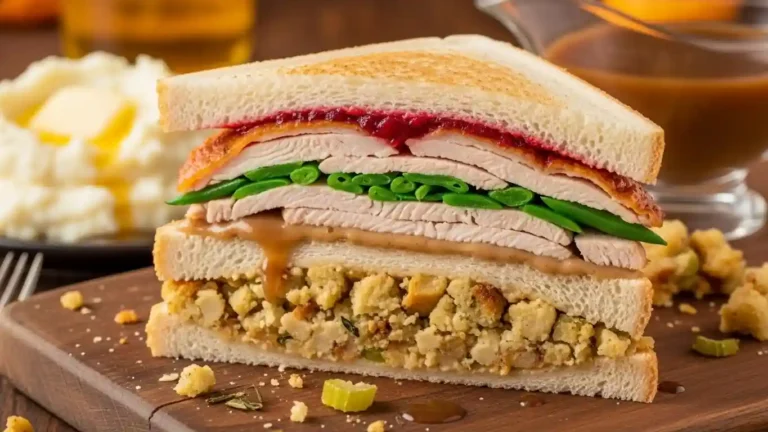
- The Ultimate Thanksgiving Sandwich: The “Moist-Maker” from Friends is famous for a reason and it’s even better when your turkey is actually juicy! Check out our Thanksgiving Leftover Sandwich guide for pro tips on layering your moist turkey with the perfect condiments and bread choice.
- Hearty Turkey Noodle Soup: Use the turkey carcass to make a rich, homemade stock. Then add shredded turkey, vegetables, and egg noodles for a comforting soup.
- Turkey and Black Bean Enchiladas: Shred the turkey and mix it with black beans, corn, and enchilada sauce. Roll into tortillas, top with cheese, and bake.
Complete Your Thanksgiving Meal
Now that your turkey is perfectly moist and ready to serve, don’t forget the classic side dishes! These easy air fryer sweet potatoes are a quick and delicious addition to your feast. For a lighter, healthier option, a simple side of steamed vegetables is always a great choice.

Can I do these fixes the next day on cold leftovers?
Absolutely. All of these methods work perfectly for reheating leftovers. The broth soak (Method 1) is particularly good for reviving cold, refrigerated turkey slices.
Will my guests be able to tell the turkey was dry?
Honestly, no. When you reintroduce moisture and flavor using broth or a rich gravy, the result is tender and delicious. They will just think you made an exceptionally moist turkey.
My turkey skin is now soggy from the broth/gravy. How can I fix it?
This is a common trade-off. To crisp it back up, you can place the moistened slices on a baking sheet and put them under the broiler for 1-2 minutes. Watch them carefully as they can burn quickly!
Is it safe to add broth to a turkey that’s been sitting out?
Only fix a turkey that has been handled according to food safety guidelines. If the turkey has been sitting at room temperature for more than two hours, it is not safe to eat or “fix”. Always prioritize safety.
Transform Your Turkey: Next-Day Dishes
Your dry turkey crisis is solved but why stop there? These tested recipes will transform your leftover turkey into completely new meals that your guests will love just as much as the original bird.
Perfect for using your salvaged turkey:
- 🥧 Best Turkey Pot Pie Recipe – A traditional comfort dish combining tender turkey, vegetables, and a golden crust. The creamy sauce ensures every bite is moist and delicious.
- 🍲 Creamy Turkey Casserole – A one-dish wonder with rich cream sauce and tender turkey. Perfect for busy days when you need dinner fast.
🥪 Thanksgiving Leftover Sandwich – Learn the secret to the ultimate turkey sandwich using your freshly salvaged, juicy turkey. Includes pro tips for the perfect condiment balance.
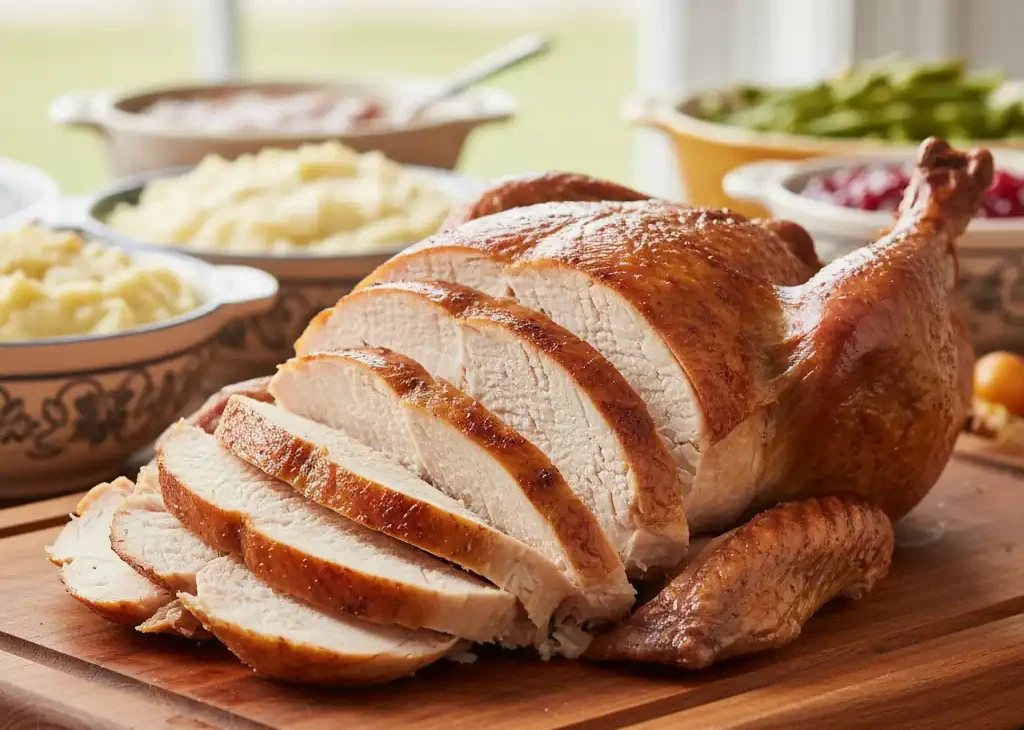
Perfectly Juicy Thanksgiving Turkey
⚙️ Equipment
- 🍳 Large Roasting Pan with Rack
- 🌡️ Instant-Read Meat Thermometer
- 🧵 Kitchen Twine
- 🧻 Paper Towels
- 🥣 Small Mixing Bowl
- 🔪 Cutting Board
🌿 Ingredients
- 🦃 1 (12-14 lb) whole young turkey, completely thawed
- 🧈 1/2 cup (1 stick) unsalted butter, softened
- 🌿 1 tbsp fresh thyme, chopped
- 🌿 1 tbsp fresh sage, chopped
- 🌿 1 tbsp fresh rosemary, chopped
- 🧂 2 tsp kosher salt
- 🌶️ 1 tsp black pepper, freshly ground
- 🧅 1 large yellow onion, quartered
- 🍋 1 lemon, quartered
- 🧄 1 head of garlic, sliced in half
- 🥣 2 cups low-sodium chicken broth
📝 Instructions
- Prepare the Turkey: Preheat oven to 425°F (220°C). Pat the turkey completely dry with paper towels. A dry skin is key to getting it crispy.
- Make Compound Butter: In a small bowl, mix the softened butter with the chopped thyme, sage, rosemary, salt, and pepper.
- Season the Bird: Gently separate the skin from the turkey breast and thighs. Rub about two-thirds of the butter directly onto the meat under the skin. Rub the remaining butter all over the outside.
- Add Aromatics: Stuff the turkey cavity with the onion, lemon, and garlic. Tie the legs together with kitchen twine.
- Roast the Turkey: Place the turkey on a roasting rack in the pan. Pour the broth into the bottom. Roast for 30 minutes at 425°F, then reduce to 350°F (175°C). Continue roasting for 2.5 – 3 hours, or until a meat thermometer reads 165°F in the thigh.
- Rest the Turkey (Crucial!): Transfer to a cutting board, tent loosely with foil, and let it rest for 20-30 minutes before carving.
- Serve: Carve and serve with your favorite Thanksgiving sides.
💡 Note
For the best results, consider dry-brining the turkey with kosher salt for 24-48 hours before roasting. And remember, the meat thermometer is your best friend for preventing a dry bird!
📊 Nutritional Information (per serving)
| Calories | 450 kcal |
|---|---|
| Protein | 54 g |
| Fat | 24 g |
| Carbohydrates | 3 g |
| Sodium | 480 mg |
Stay Connected with Me
This recipe comes from my love for simple, comforting meals that bring warmth to family dinners after long days. The gentle simmer of the broth, the softness of the vegetables, and the aroma filling the kitchen always remind me of the evenings I spent cooking beside my grandfather. He taught me that great food isn’t about perfection—it’s about care, patience, and love shared around the table.
If this recipe inspires you to cook something cozy at home, I’d love to see what you create and hear your story. Food connects us, no matter where we are, one comforting meal at a time.